Overview
The V-Ray render function is used to create high-quality rendering images.
Location
3D View > Rendering > HQ Render
Operation Method
Run V-Ray in z-weave
- Go to 3D View > Rendering toolbar > HQ Render
- If the license is ready, click Yes
- The render window appears.
-
Set the render options and click the Render button.
During the rendering, the Render button changes to Stop. - When the rendering is finished, the Stop button returns to Render. You can add the Denoise option and export or save the rendered image.
Components
Quality
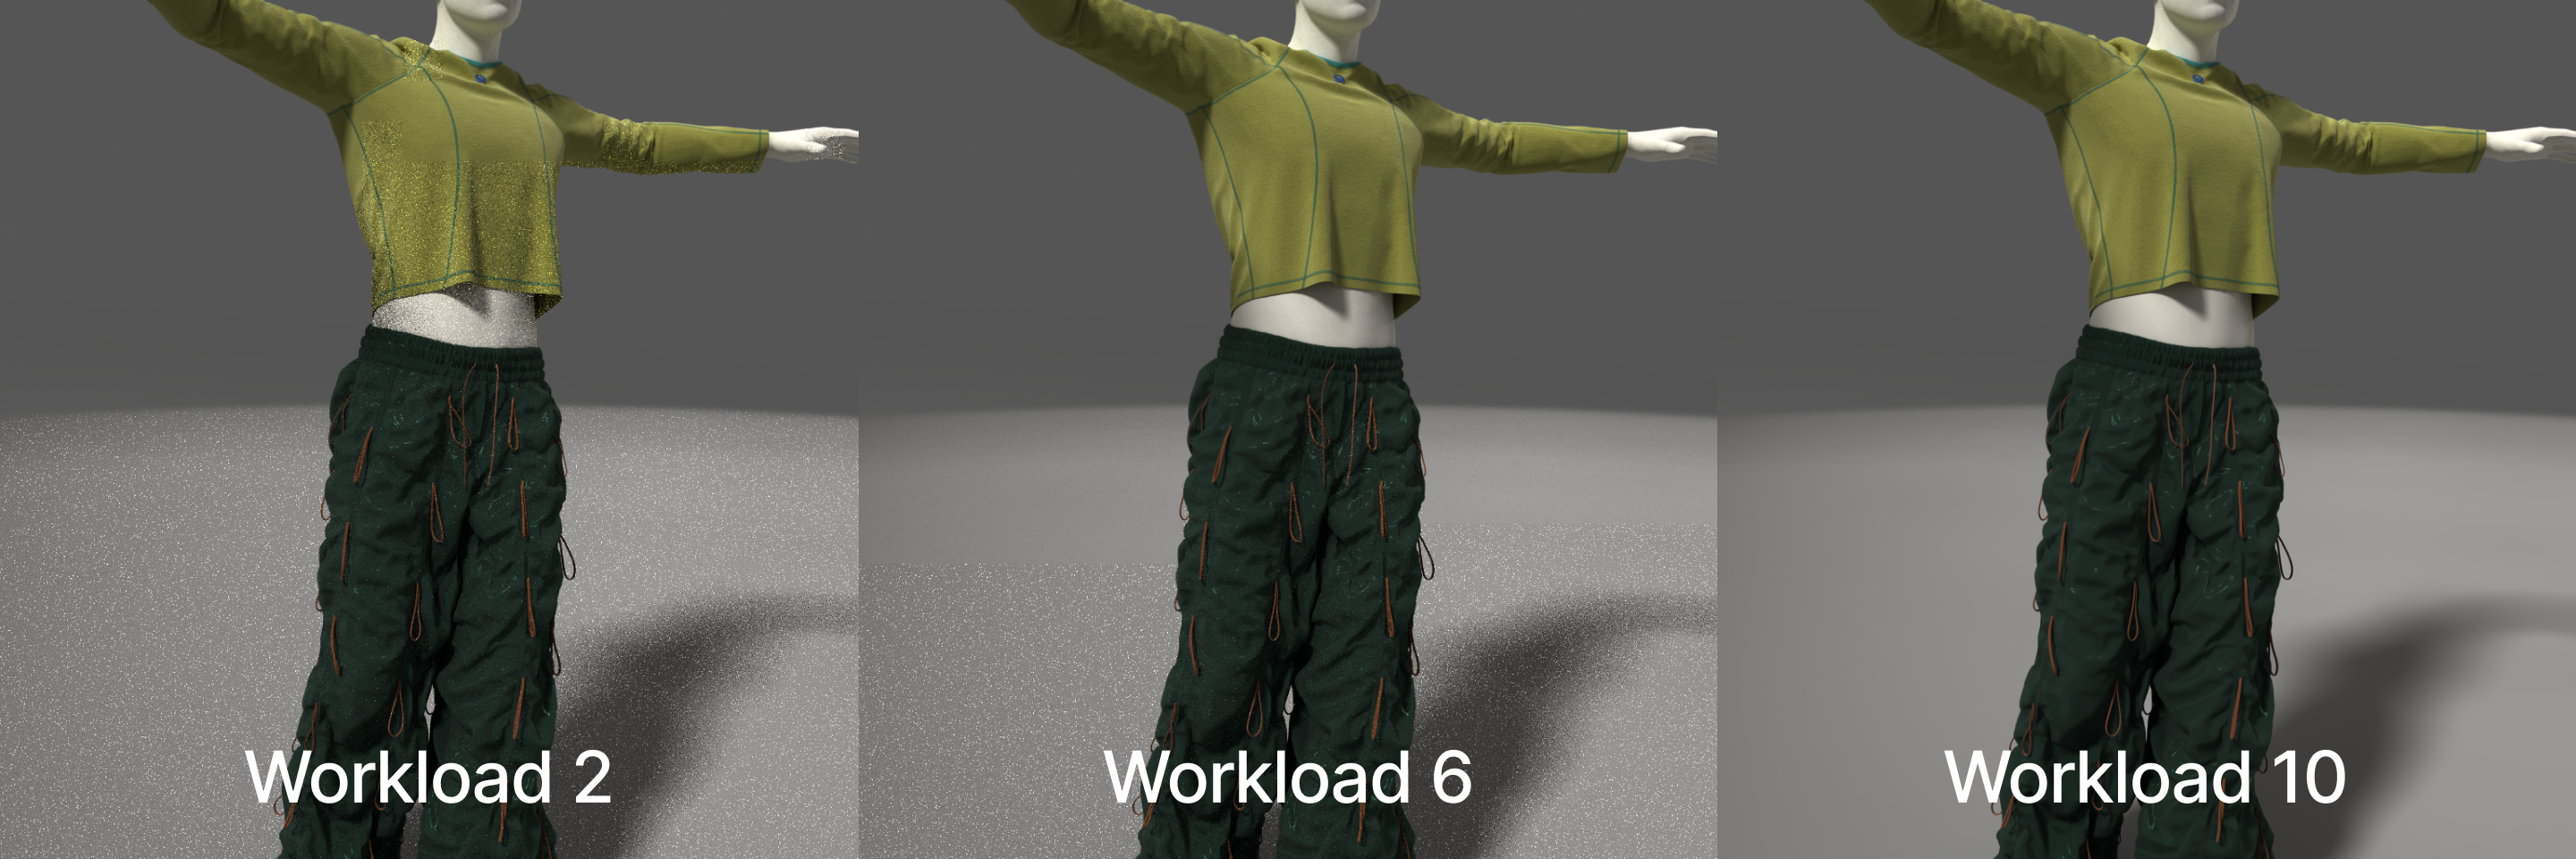
High-quality Render gradually removes noise to create a cleaner image.
Quality determines how much time it takes to remove noise.
A higher value will result in higher-quality images being created and a longer rendering time.
Workload
Resolution
The resolution designates the image size. Predetermined resolutions can be used, such as 720p, 1080p, 1k square, etc. Or it can be set to a custom number.
Width/Height
Custom resolution enables width/ height control to set the horizontal/ vertical length of the image.
Render
It is a button for starting or stopping the rendering process. When rendering starts, the corresponding button changes to stop.
Export
The screen to be rendered is saved in V-Ray file format. Rendering can be carried out with V-Ray renderer.
Save
The rendered PNG format image is saved as a file.
Denoise strength
Determines how strong the denoising operation is.
Denoise radius
Specifies the area around each pixel to be denoised. A smaller radius affects a smaller range of pixels, while a larger radius affects a larger range, which increases the noise removal.
Comments
0 comments
Please sign in to leave a comment.